How to Put Ear Buds in Your Ear for 2026: That Actually Work
Getting earbuds to sound right and stay put can be a real head-scratcher sometimes. If you've ever fiddled endlessly trying to make them work, you're not alone. Mastering how to put ear buds in your ear correctly isn't just about comfort; it's fundamental to unlocking their full audio potential and ensuring they don't bail on you mid-song or mid-call.
This guide cuts through the confusion. We'll break down the subtle but crucial steps involved, from picking the right ear tip to achieving that perfect seal. Manufacturer specifications often highlight that a proper acoustic seal can improve passive noise isolation by up to 20 decibels (dB), a significant difference you can hear and feel. Let's get your earbuds fitting and sounding their best.
Understanding the Right Earbud Fit
Getting your earbuds to feel like they were molded just for you hinges on a few key things: size, shape, and how they engage with your ear canal. It's not a one-size-fits-all situation, and that's by design. Most in-ear headphones come with multiple sizes of ear tips because everyone's ear canal is unique.
Figuring out this ideal fit is your first big win. A good fit means the earbud sits snugly in your ear canal without causing pressure or discomfort. It’s about achieving a stable, consistent seal that prevents external noise from intruding and stops your music from leaking out.
When your earbuds are inserted correctly, they should feel secure and comfortable, almost as if they're a natural part of your ear. This comfort factor is crucial, especially if you plan on wearing them for extended periods, whether you’re working out, commuting, or just enjoying your favorite podcast. Without this foundational fit, even the most expensive earbuds won't deliver the sound you paid for.
Why Ear Tip Size and Seal Are Everything
Think of your ear tips as the gatekeepers of sound quality and noise isolation. Their primary job is to create an airtight seal within your ear canal. This seal is what allows the earbud’s drivers to perform optimally, especially for bass frequencies, and it’s your first line of defense against distracting ambient noise.
This acoustic seal is paramount. Without it, bass notes can sound thin and weak because the sound waves are escaping. Similarly, external chatter or environmental noise will bleed in, ruining your listening experience.

Manufacturer specifications often confirm that achieving a good seal can boost passive noise isolation significantly, sometimes by as much as 20 decibels (dB). This means the amount of external sound that gets blocked can more than double compared to a poor fit. It’s this precise connection that transforms mediocre sound into an immersive experience.
How to Identify a Good Seal
You'll know you've got a good seal when the sound becomes richer and fuller, particularly in the lower frequencies. Often, just gently pressing on the earbud will change the sound; if it gets suddenly fuller, you know you’re on the right track. You might also notice a slight sense of pressure or fullness in your ear, this is normal and indicates the seal is working.
If you cover the earbud's nozzle with your finger and the sound volume drops noticeably, that’s another strong indicator of a solid seal. Conversely, if the sound volume doesn't change much, or if music still leaks out noticeably, the seal isn't complete.
The Step-by-Step Process to Inserting Earbuds
Getting earbuds in correctly is less about brute force and more about a gentle, precise technique. It involves selecting the right size ear tip and then using a slight twist to seat the earbud securely. Most manufacturers, like Sony, provide detailed guides on their support pages for achieving this.
Let’s walk through the process that generally applies to most in-ear headphones.
Step 1: Select Your Ear Tip Size
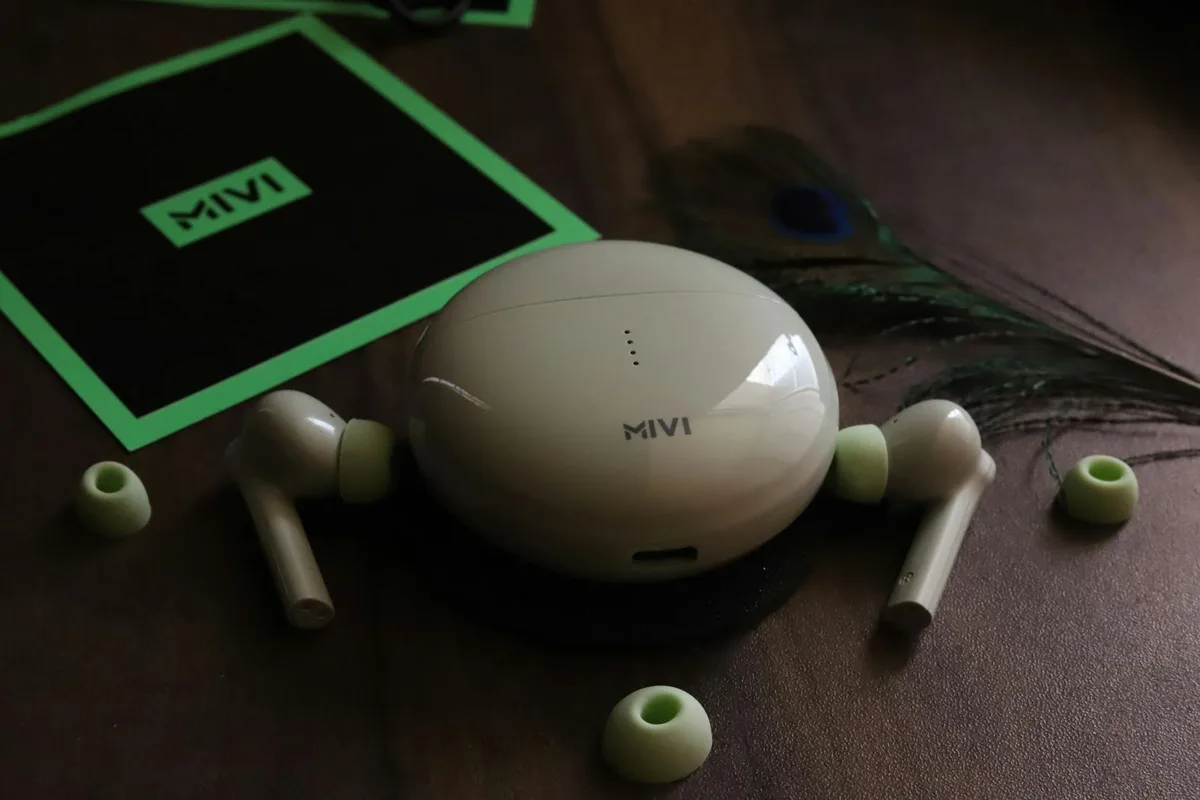
This is where you start. Your earbud package likely came with several sizes of ear tips, usually small, medium, and large. You need to find the size that fits comfortably and snugly in your ear canal.
Try the medium tips first. If they feel too loose, like they might fall out easily, or if you can still hear a lot of external noise, try the larger size. If the larger size feels too tight, painful, or like it's pushing too hard against your ear canal, then downsize to the small tips. The goal is a comfortable, gentle plug, not a forceful cramming.
Step 2: The Insertion Technique
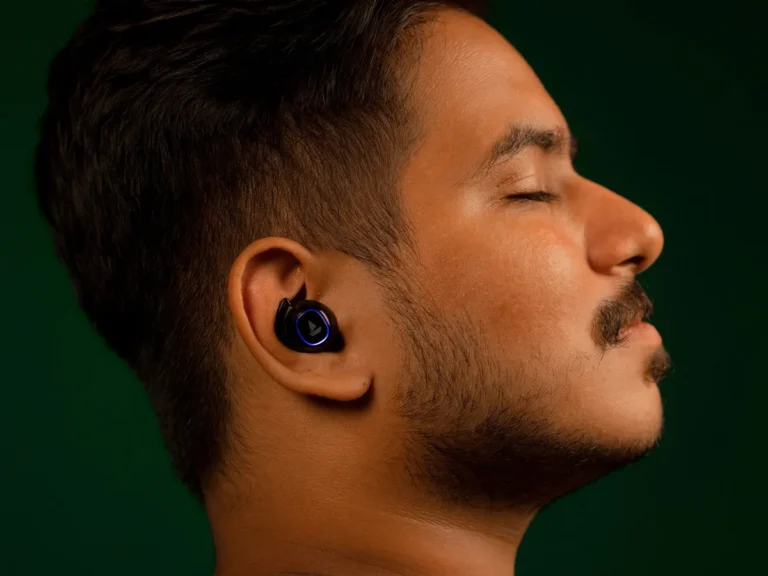
With the correct ear tip attached, it's time to insert the earbud. For most earbuds, you’ll want to use a slight tug to straighten your ear canal. Gently pull the top of your ear upwards and slightly outwards with your free hand.
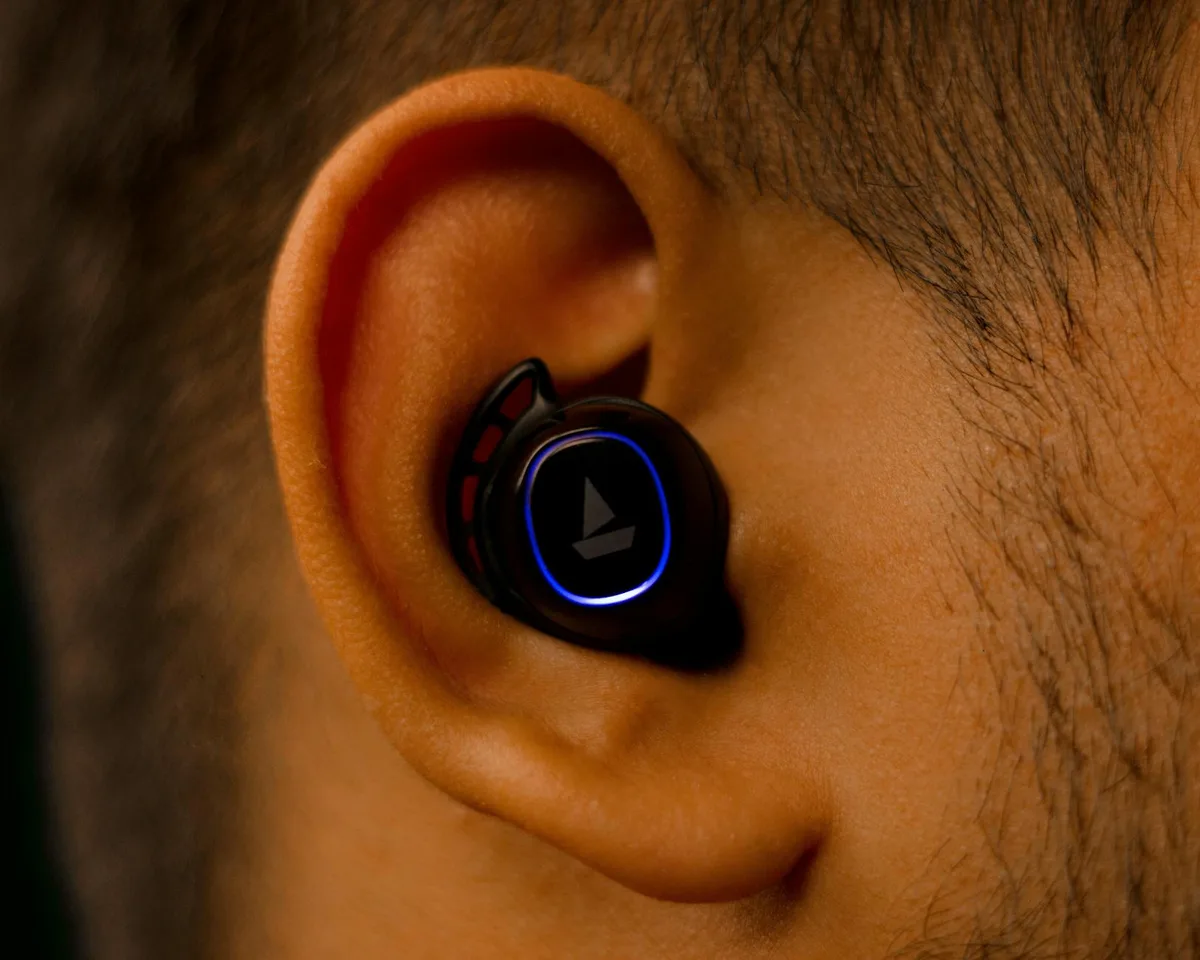
This action, known as the "pull-and-twist" method, helps open up your ear canal, making it easier for the earbud to slide in and create a proper seal. Once your ear canal is slightly opened, gently insert the earbud. Don't force it; it should go in with minimal pressure.
Step 3: Achieve a Secure Fit and Seal
After inserting the earbud, give it a gentle twist, usually clockwise, while continuing to hold your ear up. This twist helps the ear tip expand and conform to the shape of your ear canal, creating that vital acoustic seal. The earbud should feel stable and secure, without wobbling or having a tendency to slip out.
You should immediately notice a difference. The world around you should sound quieter, and your music (if playing) will likely sound fuller and more present. If you don’t hear a change, or if it still feels loose, try adjusting the angle or giving it another gentle twist.
Common Earbud Insertion Mistakes and How to Fix Them
Even with the best intentions, it's easy to make a few common mistakes when inserting earbuds. These errors can lead to discomfort, poor sound, or earbuds that simply refuse to stay in place, no matter how much you fiddle with them. Fortunately, most of these issues are easily corrected once you know what to look for.
One of the most frequent pitfalls is using the wrong size ear tip. If the tips are too small, they won't create a seal, and the buds will feel loose. If they’re too large, they can cause discomfort and might even prevent the earbud from seating properly.
When Earbuds Just Won't Stay In
If your earbuds are constantly falling out, especially during physical activity like running or working out, it's almost always a fit issue. A secure fit is critical for earbuds used during exercise, and many brands design specific ear fins or wingtips to aid stability. However, even without those, the correct ear tip size and insertion technique are foundational.
For instance, if you’re only using the default medium tips that came with your earbuds and they’re slipping, try the larger size. You might need to experiment further, even trying foam ear tips if silicon ones aren’t providing enough grip, as foam can expand to fill the ear canal for a more secure hold.
Sound Quality Issues from Poor Fit
A weak or inconsistent seal is a prime culprit for bad sound quality. Many users complain about weak bass, tinny highs, or a lack of clarity. Often, the earbuds aren’t the problem; it's how they're inserted.
If you insert an earbud and the sound seems muffled or lacks bass, try reinserting it, ensuring you’re straightening your ear canal and giving it that final twist. You might be able to hear a dramatic difference in the bass response by simply adjusting the earbud's position or trying a different ear tip.
Expert Tips for Optimal Earbud Comfort and Sound
Building on the basics of fit and seal, a few expert insights can really elevate your experience with in-ear headphones. These aren't necessarily complicated tricks, but rather mindful adjustments that seasoned users swear by. They focus on maximizing both comfort for long listening sessions and the sonic performance of your earbuds.
One tip often shared is to pay attention to the ear canal's natural shape. Each ear is different, and the angle at which the earbud enters can significantly impact how it sits and seals. Experimenting with slight variations in insertion angle, even a few degrees, can sometimes unlock a vastly improved fit.
Troubleshooting a Loose Fit
If you've tried different ear tip sizes and the earbuds still feel loose, consider the ear tip material itself. Silicone tips offer a smooth, easy-to-clean surface, but sometimes they can be a bit too slick, especially in warmer conditions or with sweat.
Foam ear tips, on the other hand, offer a more conforming, grippier surface. They expand after insertion, creating a dense seal that can be excellent for both sound isolation and stability. Brands like Comply specialize in high-quality foam replacement tips, which many find superior to the stock ones for demanding use cases.
Dealing with Ear Canal Discomfort
Discomfort from earbuds usually stems from one of two things: the ear tip is too large, creating excessive pressure, or the earbud itself is being inserted too deep or at an awkward angle. If a correctly sized ear tip still feels painful, try inserting it slightly less deeply or adjusting the angle.
Remember, the goal is a snug fit with the ear tip creating the seal, not pushing the entire earbud housing deep into your ear canal. Some earbuds have longer nozzle designs which might also affect comfort and depth perception, so understanding the physical dimensions of your specific model can help.
When to Consider Different Ear Tip Materials
The standard issue silicone ear tips that come with most earbuds are a good starting point, but they aren't the end-all-be-all. For many users, switching to different materials can make a world of difference in comfort, fit, and overall sound performance. It’s a relatively inexpensive upgrade that can drastically improve your listening experience.
Silicone tips are generally durable, easy to clean, and provide a decent level of passive noise isolation. However, some people find they can become slippery with ear moisture or sweat, leading to fit issues, especially during exercise.
- Silicone: Great for basic comfort and hygiene. Might be slippery for some.
- Foam: Offers superior acoustic sealing and stability. Expands to fit the ear canal. Can be less breathable and may require more frequent replacement due to ear wax buildup.
- Hybrid: Some manufacturers offer hybrid tips, combining a silicone outer shell with a foam core, aiming for the best of both worlds.
If you’re experiencing persistent fit problems or discomfort, exploring replacement ear tips made from foam or a hybrid material is a highly recommended step. Many third-party brands offer these in various sizes, so you can tailor the fit to your specific needs. For example, studies on acoustic coupling in hearing devices emphasize the importance of a flexible yet sealing interface, a role well-filled by well-chosen ear tips.
Understanding Noise Isolation vs. Active Noise Cancellation
It's important to differentiate between passive noise isolation and active noise cancellation (ANC), as they both contribute to a quieter listening experience but operate very differently. Passive isolation is purely mechanical; it's about physically blocking sound waves from reaching your ears. ANC, on the other hand, uses technology to actively cancel out ambient noise.
The effectiveness of both is surprisingly linked to how well your earbuds fit. A great seal, which we've discussed, is the foundation of passive noise isolation. It’s the physical barrier that stops much of the outside world from getting in.
How Fit Impacts Both
For passive noise isolation, a good deal is straightforward: the better the seal created by the ear tips, the more sound is blocked. This is why selecting the correct ear tip size and ensuring a snug fit is non-negotiable if you want to shut out distractions.
Active noise cancellation relies on microphones to detect ambient sound and then generate opposing sound waves to cancel them out. However, for ANC to work efficiently, it needs a solid base of passive isolation. If your earbuds leak sound or let in too much external noise due to a poor fit, the ANC system has to work twice as hard, often resulting in reduced effectiveness and potentially a less pleasant listening experience, sometimes even introducing unwanted hiss.
Real-World Earbud Fit Scenarios
How you use your earbuds plays a big role in what kind of fit you need. Someone who uses them primarily for light listening at a desk might tolerate a less secure fit than an athlete who needs their earbuds to stay put during intense workouts. Understanding these scenarios can help you gauge your priorities when selecting and fitting your earbuds.
For many people, the ideal scenario involves earbuds that can transition seamlessly between different activities without requiring constant adjustment. This means finding a fit that is comfortable for hours of wear while also being robust enough to withstand movement.
For Workouts and Running
When your heart rate is up and you're on the move, earbud security is paramount. You don't want to be interrupted by earbuds slipping out during a sprint or a heavy set at the gym. A secure fit here means the earbud stays firmly in place, providing consistent sound and isolation even with vigorous motion and sweat.
This often requires a slightly deeper insertion and a firm seal, possibly with larger ear tips or even earbuds that feature wingtips or ear hooks for added stability. The key is that the earbud feels like it’s locked in, not just passively resting.
For Focus and Commuting
For prolonged listening sessions, whether you're concentrating on work, enjoying a podcast on a long commute, or simply relaxing, comfort becomes the leading factor. Earbuds that feel pressurized or cause irritation after an hour or two won't be enjoyable. A comfortable fit allows for extended use without listener fatigue.
Here, the seal is still important for blocking out distractions, think office chatter, airplane engine noise, or traffic sounds. However, comfort takes precedence; you want a fit that feels natural and unobtrusive. This might mean opting for softer ear tip materials or a less aggressive insertion depth that still provides adequate isolation.
How to Clean Your Earbuds for a Better Fit
Keeping your earbuds and their ear tips clean is crucial for both hygiene and maintaining an optimal fit. Over time, ear wax, dirt, and skin oils can build up on the ear tips and the earbud nozzles. This buildup can degrade the seal, leading to diminished sound quality and potentially irritation or even infection.
Regular cleaning ensures that the ear tips can still effectively conform to your ear canal. A dirty ear tip can become slick or uneven, preventing that critical acoustic seal from forming properly. It's a simple maintenance step that has a direct impact on performance.
Cleaning Silicone Ear Tips
Silicone ear tips are generally the easiest to clean. Most manufacturers recommend a simple wash with lukewarm water and mild soap. After washing, rinse them thoroughly to remove all soap residue.
It's essential to let the ear tips air dry completely before reattaching them to your earbuds. Reattaching them while they're still damp can damage the earbud's internal components or affect the adhesive holding the tips. Be patient here; damp ear tips can also feel a bit slippery, temporarily impacting your fit.
Cleaning Foam Ear Tips
Foam ear tips require a gentler approach. You can often clean them by gently wiping them with a slightly damp cloth or a specialized foam cleaner designed for earbuds. Avoid submerging foam tips in water, as this can degrade their structure and compromise their ability to expand and seal properly.
Some manufacturers suggest gently squeezing the foam ear tip to express accumulated debris. Always allow foam tips to air dry completely before use. If foam tips become heavily soiled or start to break down, it's often best to replace them, as their integrity is key to a good seal.